nginx優化的幾點方法(圖文)
一.優化Nginx并發量
| 1 2 3 |
[root@proxy ~]# ab -n 2000 -c 2000 http://192.168.4.5/Benchmarking 192.168.4.5 (be patient)socket: Too many open files (24) //提示打開文件數量過多 |
修改Nginx配置文件,增加并發量
| 1 2 3 4 5 6 7 8 9 |
[root@proxy ~]# vim /usr/local/nginx/conf/nginx.conf.. ..worker_processes 2; //與CPU核心數量一致events {worker_connections 65535; //每個worker最大并發連接數use epoll;}.. ..[root@proxy ~]# nginx -s reload |
二.優化Linux內核參數(最大文件數量)
| 1 2 3 4 5 6 7 8 9 |
[root@proxy ~]# ulimit -a //查看所有屬性值[root@proxy ~]# ulimit -Hn 100000 //設置硬限制(臨時規則)[root@proxy ~]# ulimit -Sn 100000 //設置軟限制(臨時規則)[root@proxy ~]# vim /etc/security/limits.conf .. ..* soft nofile 100000* hard nofile 100000#該配置文件分4列,分別如下:#用戶或組 硬限制或軟限制 需要限制的項目 限制的值 |
優化后測試服務器并發量
| 1 | [root@proxy ~]# ab -n 2000 -c 2000 http://192.168.4.5/ |
三.優化Nginx數據包頭緩存
| 1 2 3 4 5 6 7 8 9 10 11 |
[root@proxy ~]# cat lnmp_soft/buffer.sh #!/bin/bashURL=http://192.168.4.5/index.html?for i in {1..5000}do URL=${URL}v$i=$idonecurl $URL //經過5000次循環后,生成一個長的URL地址欄[root@proxy ~]# ./buffer.sh.. ..<center><h1>414 Request-URI Too Large</h1></center> //提示頭部信息過大 |
修改Nginx配置文件,增加數據包頭部緩存大小
| 1 2 3 4 5 6 7 8 |
[root@proxy ~]# vim /usr/local/nginx/conf/nginx.conf.. ..http {client_header_buffer_size 1k; //默認請求包頭信息的緩存 large_client_header_buffers 4 4k; //大請求包頭部信息的緩存個數與容量.. ..}[root@proxy ~]# nginx -s reload |
四.對頁面進行壓縮處理
| 1 2 3 4 5 6 7 8 9 |
[root@proxy ~]# cat /usr/local/nginx/conf/nginx.confhttp {.. ..gzip on; //開啟壓縮gzip_min_length 1000; //小文件不壓縮gzip_comp_level 4; //壓縮比率gzip_types text/plain text/css application/json application/x-javascript text/xml application/xml application/xml+rss text/javascript; //對特定文件壓縮,類型參考mime.types.. .. |
五.服務器內存緩存
| 1 2 3 4 5 6 7 8 9 |
http { open_file_cache max=2000 inactive=20s; open_file_cache_valid 60s; open_file_cache_min_uses 5; open_file_cache_errors off;//設置服務器最大緩存2000個文件句柄,關閉20秒內無請求的文件句柄//文件句柄的有效時間是60秒,60秒后過期//只有訪問次數超過5次會被緩存} |
六.瀏覽器本地緩存靜態數據
| 1 2 3 4 5 6 7 8 9 10 11 12 13 14 |
[root@proxy ~]# vim /usr/local/nginx/conf/nginx.confserver { listen 80; server_name localhost; location / { root html; index index.html index.htm; }location ~* \.(jpg|jpeg|gif|png|css|js|ico|xml)$ {expires 30d; //定義客戶端緩存時間為30天}}[root@proxy ~]# cp /usr/share/backgrounds/day.jpg /usr/local/nginx/html[root@proxy ~]# nginx -s reload |
點個贊! ()
- 上一篇
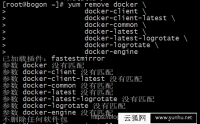
Centos7安裝Docker(圖文)
1.卸載docker舊版本(我的centos7是新的,所以運行后不刪除任何軟件包) 1 2 3 4 5 6 7 8 yum remove docker \ docker-client \ docker-client-latest \ docker-common \ docker-latest \
- 下一篇
IIS7 IIS8 http自動跳轉到HTTPS(80端口跳轉443端口)(圖文)
IIS7需要先確認是否安裝 “URL REWRITE2 ” 偽靜態模塊 , 如果您已經安裝可以跳過URL REWIRTE (偽靜態模塊)下載地址 : http://www.iis.net/downloads/microsoft/url-rewrite第一步: 選擇站點, “URL 重寫&
更多相關
相關文章
- linux的目錄結構;Linux系統各個目錄的作用介紹
- mssql2000數據庫通過附加數據庫轉到SQL2008(圖文)
- Win2012配置asp網站(圖文教程)
- win2008 r2系統iis7中如何設置ip限制(圖文)
- IIS7 支持html頁面包含(include)html頁面 IIS設置與代碼編寫
- Win2003+IIS6.0+php5.2.2+MySQL 5.0.41+phpMyAdmin 2.10.1環境配置安裝
- 網站采集入庫502 Bad Gateway錯誤時,修改PHP 配置修改參考
- 出錯了,[騰訊云COSFS]運行時發生錯誤!qcloud_cos.cos_exception.CosClientError: SecretId and SecretKey is Required!
- 騰訊Linux云主機快速掛載云盤命令,設置開機自動掛載詳細圖文教程
- 騰訊輕量云主機win2012系統掛載SSD云硬盤操作步驟(圖文)